rswtch

A switch to remotely power cycle development devices.
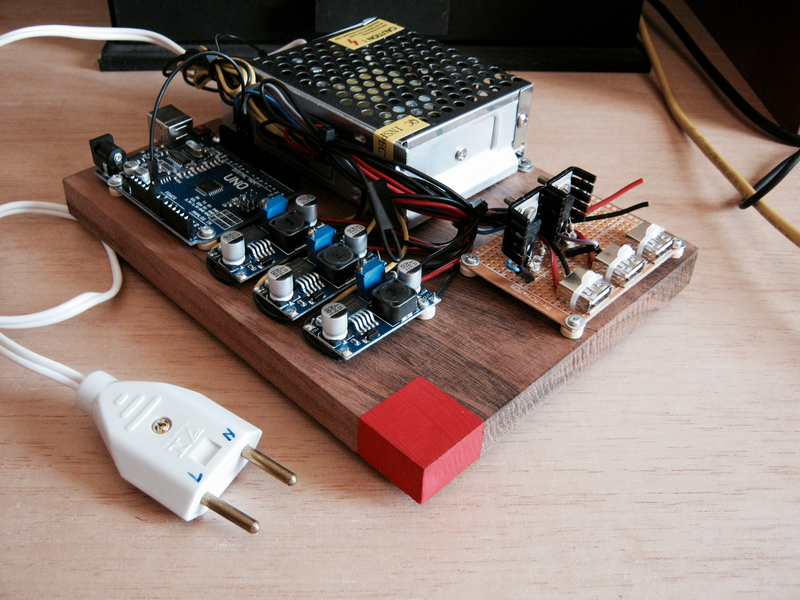
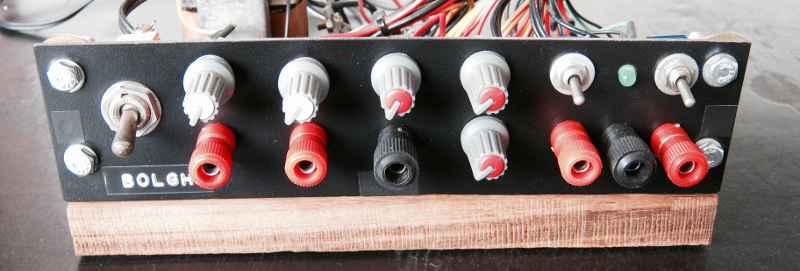
rswtch (front)

The problem: To develop for some boards like BeagleBone Black, Cubieboard 2 and Banana Pi, eventually a physical reboot is needed, either to reboot a freezed kernel or to develop low level features, within kernels or not.

This isn't too much of a problem on an environment of a good OS, where all kind of memory protections prevent wrong actions. When not above the confortable user level, one can't simply soft reboot because sometimes you won't even have a keyboard ready to accept commands. It's easy when the board is under someones nose, where a power cycling is easy to reset the board to a know state. However, it's very common to have to do this kind of development from a remote site, and without a remote switch like this, it is nearly impossible.

There are different products on the market that do power cycling. The ZY1000 JTAG debugger uses a relay. In their website, it's not clear whether they use a classic solenoid relay or some sort of a solid-state component. Some advanced PDUs (power distribution units) have this capability too, among others, like power metering, monitoring, etc. High-end computer systems, like servers, also have similar features, usually integrated onto the main board that holds the CPU. It's called BMC, and it stands for baseboard management controller. The latter are complex systems that do much more than just allow to reboot the computer. But unnecessary complexity is bad. Strive to solve problems with simple and elegant designs.
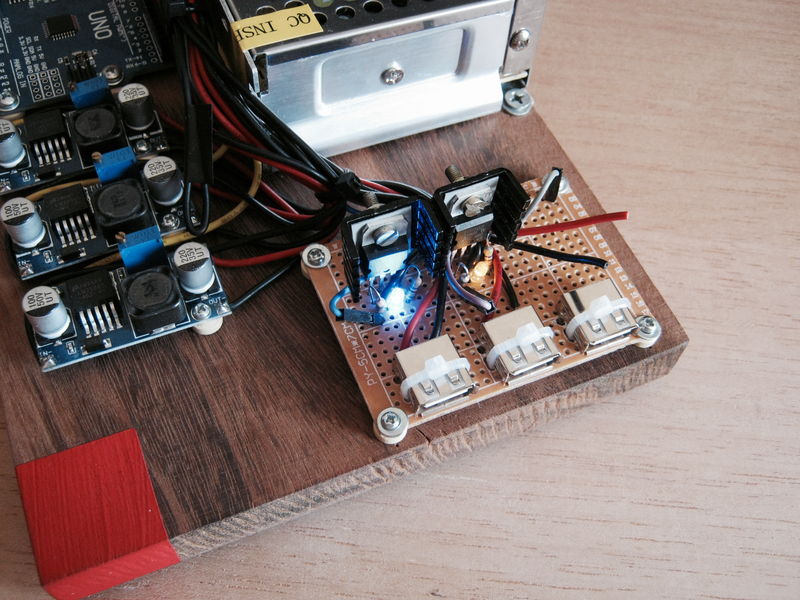
rswtch (on)

To the project itself, the goal was to have 3 channels, but not enough items were available at the workshop. The solution was to order some components for further assembly. The transistors used were 2 Darlington TIP102. In easy words, Darlington transistors have a very high gain, meaning it draws very low current from the microcontroller to make it work in the active mode (as a switch). The third not-assembled-yet channel will feature a MOSFET, either a IRFZ44 or a IRF3205. FET means field effect transistor, and in this type of transistor, there are no current drawing through its gate to bring it to the active mode. It can be driven by very low current ICs without a hassle.

Security considerations

Security is a concern. Since it can turn on and off the boards connected to it, you won't want anyone with access to your network to be able to do this. Although an Ethernet interface was considered, there are a lot of problems that must be solved in a microcontroller very very tiny flash RAM: authentication, cryptography, etc. Of course this is impossible.

Using this module connected directly through USB and accessing the rswtch built-in terminal ends up isolating the module to those who have access to the computer it's connected, which can be accessed (only) through SSH and leverage all the security of such approach.

Code

The source code of the firmware and the CLI utility can be seen here, as well with some operation details.

EDIT: There are some ramifications of this story based on some technical aspects.

How it was supposed to work, or how it was tested

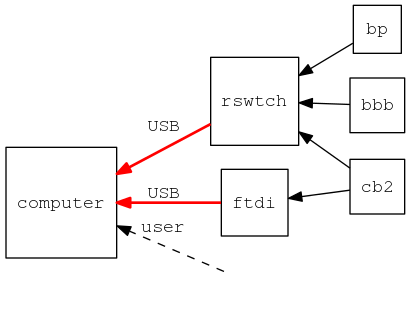
Not all the details were shown on how this was tested. The plan was to have only one host with at least 2 USBs in a configuration as shown on the graph below.
rswtch - case 1

Index:

Just note the red arrows of the graph above. As it turns out, this didn't work as expected. Note that cb2 has 2 ramifications. If both ftdi and rswtch are connected to the USB ports of the same computer, we have one peculiarity which prevents this to work. The common configuration of most, if not all of the computers, is to have a common ground for the USB ports. This problem is also known as ground loop. This do not deserve too much detail, as it's not the point. However, it's important to note that because of this peculiarity, even if the channel is switched off by the rswtch transistor, ftdi keeps the lights on and maintains the USB 5V which rswtch were trying to shut down.

One solution is to add an USB isolator. Most of these are sold for industrial applications. As it's common, industrial usually means expensive, and although the robusteness of these solutions are attractive, the point here is to have something cheaper. There are 2 ICs which are commonly used to build USB isolators: 1) from Analog Devices labeled ADuM4160 and 2) from Linear labeled LTM2884. There are probably others.

So why worked at the first time? It was tested with this configuration:
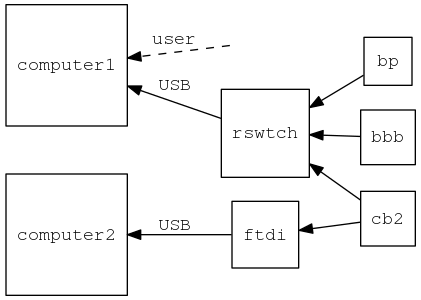
rswtch - case 2

Note that the common ground is eliminated. However, one additional computer is used, which is of course undesired.

The third approach was to disregard the security implications explained above and add an Ethernet module on top of the microcontroller plus a very simple protocol on top of the UDP protocol.
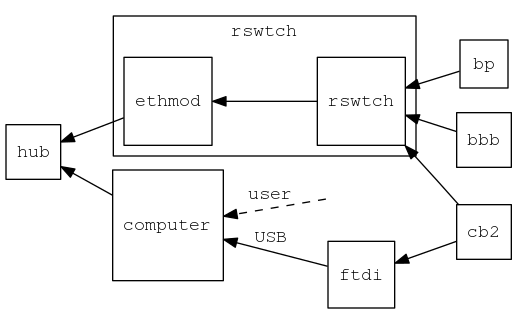
rswtch - case 3

More on this later.

more ...

BB e Java em distro Debian-based

(portuguese)

A última mudança do sistema do Banco do Brasil quebrou quem utiliza um sistema que não seja Windows, seja Linux, OpenBSD, Mac ou outros. No entanto, em distros Debian-based (Ubuntu, Linux Mint, entre outros), existe uma solução relativamente simples:

$ sudo add-apt-repository ppa:webupd8team/java
$ sudo apt-get update
$ sudo apt-get install oracle-java7-set-default

Existem diferentes implementações de Java, como OpenJDK, Oracle Java, IBM Java, etc. A "oficial" é a da Oracle (antiga Sun), mas a maioria das distros utiliza como default a OpenJDK, justamente por ser open source. Trocar a OpenJDK pela Oracle Java não deveria ser necessário, e pode quebrar outras aplicações, mas resolve o problema.

more ...

Using an USB flash drive to boot OpenBSD/macppc

I have an iMac G3. It's old. I like it. More than once, I screwed up the OS and had to install again.

You have more than one way to do it. You can boot from a CD-ROM, but mine is broken, as most of the CD-ROMs drives on dated machines. Or boot from the network, but you have to setup the environment. Or boot from an USB flash drive, which I didn't think it was possible until I tried a few days ago.

There are some discussions about how to correctly create a bootable USB install media for OpenBSD. Recently, Chris Cappuccio announced the availability of images ready to be copied to an USB flash drive, but they are for i386 and amd64 ports only.

One way which is very debatable on how to do this is to dd the ISO image directly to the USB flash drive. Not because it doesn't work, but because it may not work on all systems. A .iso, more specifically an ISO 9660 .iso file, is a filesystem suited for optical discs, not USB flash drives. Some firmwares (IBM PC BIOS, Open Firmware) will see them as a disk, but you can't be so sure about this. However, this is not the only problem. If you want to dig about the concerns raised on the mailing lists, you can check the archives here and here.

What I'm putting up here is not what you should do, but instead what have worked for me. It's a Reminder For Myself. OpenBSD team is very rigorous about the project documentation, and what's stated at the INSTALLATION NOTES for OpenBSD/macppc 5.6 should be applicable to all supported machines, not just my case as I'm doing here. So, if you read it here, or any other blog for that matter, don't ask it on the mailing lists. Refer to the official FAQ. Refer to the man pages. If you don't find what you're looking for on these references, then yes, ask on one of the mailing lists.

At the time of this writing, the latest version of OpenBSD is 5.6. So, download the cd56.iso from your preferred mirror:

$ ftp ftp://ftp.openbsd.org/pub/OpenBSD/5.6/macppc/cd56.iso

dd'it to your USB flash drive:

# dd if=cd56.iso of=/dev/sd1c bs=4k

To check, in Open Firmware, at some point you'll see something like this:

0 > dev / ls
...
ff909748: /pci@f2000000
...
ff926b98:   /usb@18
ff947668:     /disk@0
ff92e820:   /usb@19
ff947288:     /keyboard@1
...
0 >

If you remove the USB install media, you'll note that this turns out to something like this:

0 > dev / ls
...
ff909748: /pci@f2000000
...
ff926b98:   /usb@18
ff92e820:   /usb@19
ff947288:     /keyboard@1
...
0 >

Notice that the disk just below /usb@18 gone. Of course, this can vary depending on the model of your machine, the Open Firmware version, etc, but nonetheless it will be very similar. And you don't need the whole path to indicate from where to boot. You can use the devalias command for this:

0 > devalias
...
usb0                /pci@2f000000/usb@18
...
0 >

To boot:

0 > boot usb0/disk@1:,\ofwboot

OpenBSD/macppc
boot> boot 5.6/macppc/bsd.rd

Also note that cd56.iso doesn't have a bsd.rd right at the root, so you need to specify the path to it. Now install OpenBSD/macppc almost as equal to any platform.

more ...

Parameters, Arguments and Options

There is a confusing concept about each one. You use this all the time, you know exactly how they work, but until the moment to try to write about it, you get asking yourself: "parameter or argument"? To this list, I added options too. Why? Because parameter is often used when you are reading man pages.

You can read the differences between then in Wikipedia or in other places, but I'll try a simpler, more visual approach. There are two main contexts where you use these terms: in 1) programming and in 2) command-line interface.

Programming Context

  • (formal) parameter: is the variable in a function definition or in a prototype declaration, and is used to denote type. Example:

    /* function definition, so a and b are parameters */
    int func(int a, int b) { ... }
    
  • (actual) argument: is the value or expression in a function call, and is used to denote an instance. Example:

    /* this is a function call, 3 and (x + y) are arguments */
    func(3, x + y);
    

Command-line Interface Context

In this context, the terms CLI argument or parameter are used interchangeably. The intent is to detail some terminology, not all possibilities, such as --longoptions and other combinations. Take for example the following:

    $ cmd -xarg something
  • -x is an option, called also switch or flag, which is a parameter/CLI (command-line interface) argument
  • -xarg (or -x arg) is an option plus its option argument (sometimes optional), which is a parameter/CLI argument
  • something is a parameter/CLI argument
  • -xarg something (the whole thing after cmd) is also a parameter/CLI argument

It's a logic exercise.

more ...

Calling C from Lua

The same title of the Chapter 26 of Roberto Ierusalimschy book Programming in Lua. Although the chapter (and all the book) is very clear, what is not so clear is where the pieces fit together and what to do to really call C from Lua, how to compile the library, etc.

It's pretty comprehensible he didn’t cover this: Lua runs on a variety different environments and it's impossible to cover them all. Here I'll cover a POSIX-compatible (pretty much a Unix-like, although there are non-Unix systems which are compatible too) system. Windows uses a very different approach.

First, fit all C pieces together. If this sounds ilogical, read the chapter. This is a complement, not the whole history.

/* mylib.c */
#include <stdio.h>
#include <string.h>
#include <math.h>

#include "lua.h"
#include "lualib.h"
#include "lauxlib.h"

static int l_sin (lua_State *L) {
    double d = luaL_checknumber(L, 1);
    lua_pushnumber(L, sin(d));
    return 1;
}

static const struct luaL_Reg mylib [] = {
    {"mysin", l_sin},
    {NULL, NULL} /* sentinel */
};

/* main function */
int luaopen_mylib (lua_State *L) {
    luaL_register(L, "mylib", mylib); /* 5.1, LINE 22 */
    //luaL_newlib(L, mylib); /* 5.2, LINE 23 */
    return 1;
}

Note the line 22. You should link your library against Lua 5.1. Starting from 5.2, it uses a new function called luaL_newlib(). If you want to link agains Lua 5.2, it's just a matter to uncomment line 23 and to comment line 22.

You should locate where your Lua headers are installed. For third-party packages, they’re normally under /usr/local/include. Since I usually have both Lua 5.1 and 5.2, they are separated. In my case, they are in /usr/local/include/lua-5.1. This directory will serve as a parameter to the gcc -I option.

You should also locate where your shared libraries are. For third-party packages, they are usually under /usr/local/lib. This directory will serve as a parameter to the gcc -L option.

Shared libraries in the directory specified with -L have a lib*.so.* pattern. As an example, if your shared library file is called liblua5.1.so.5.1, your library is called lua5.1. If you don’t have a good understanding of it, this should help.

To compile your library, run the following command:

$ gcc -shared -I/usr/local/include/lua-5.1 -lm -omylib.so mylib.c

Some explanation of what options tells what to gcc:

  • -I and -L were explained above
  • -shared option tells gcc to create a shared library instead of an executable
  • -llua5.1 to link against Lua 5.1
  • -lm since we are using functions from the Standard C Library, we should link against it too
  • -o filename of the library

Time to use Lua hat. It's trivial to use this library:

/* main.lua */
#!/usr/bin/env lua

local mylib = require "mylib"

print(mylib.mysin(30))

On command-line, you should see this:

$ ./main.lua
-0.98803162409286
$

That's it. If you find any typos, errors, please notify me.

Edit: As pointed out by Philipp Janda in lua-l mailing list, on some Unices Lua exports its symbols from the executable by default, and linking with liblua isn’t necessary.

more ...

Wave

Wave is a function generator.

Wave (front)

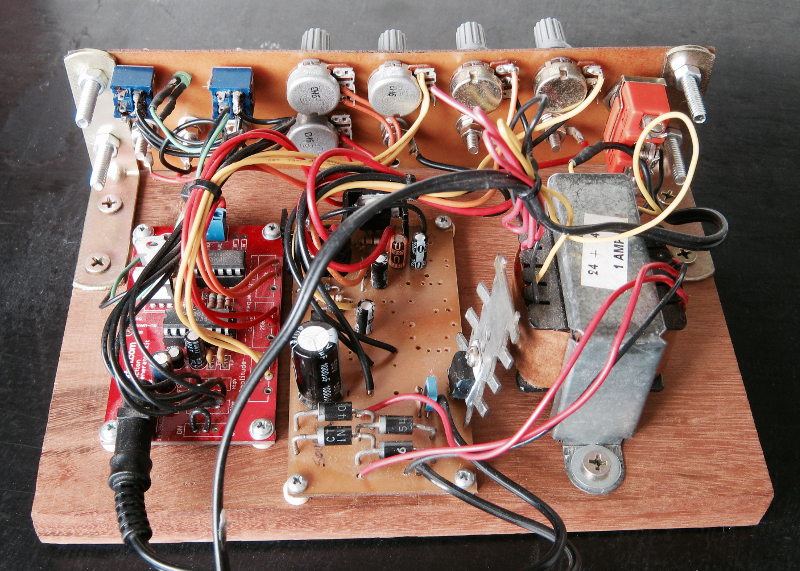
It's based on the XR-2206 from Exar, and the board is a retired one from Sparkfun. The design is based on a circuit presented on the datasheet itself, so nothing fancy here.

Wave (inside)

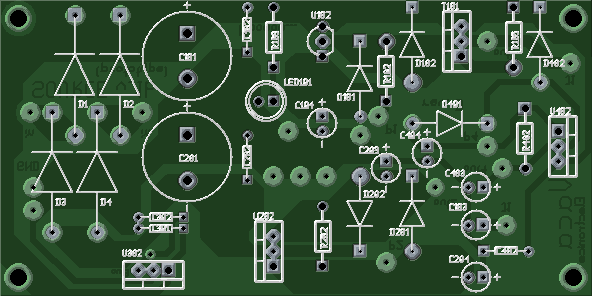
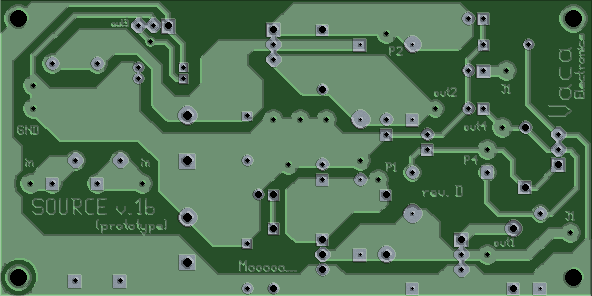
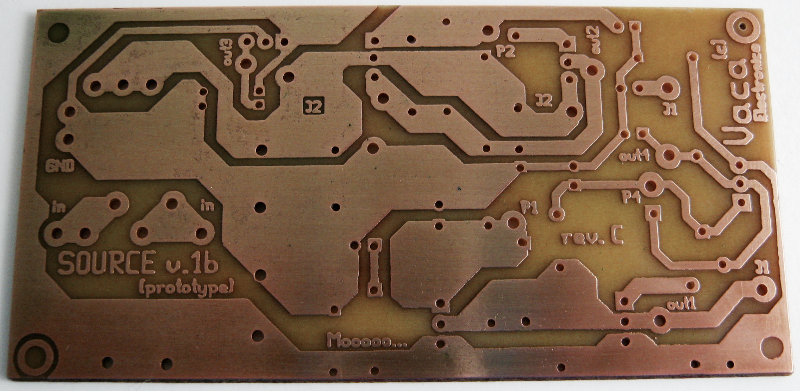
The power supply for the function generator is a custom one, called Source, built with gEDA. gEDA is a full GPL'd suite and toolkit of Electronic Design Automation tools. The result is available here (for direct use with gschem + pcb, both part of the toolkit). The design includes the power supply for the signal generator itself plus 2 more channels, 1 asymmetric (3A max) and 1 normal (1A max). The prototype thing:

Source - prototype PCB (back)

Source - prototype PCB (front)

The real thing:

Source - PCB (new)

Source - PCB (production)

more ...